

Learn More About HVAC Flaring Tool
Flare fittings are the only viable alternative to soldering when transporting aircon refrigerant, fuel oil, gas, or high-pressure water via soft copper or aluminium tubing. Flare fittings provide a robust mechanical joint able to withstand pressures in the 450-3000 psi range. It depends on the pressure rating of the materials being used, where soldering with an open flame may be problematic or dangerous (a genuine possibility when working with gas and oil lines). Flaring tools are pipe fittings' adaptable mechanisms. They receive plastic metal piping. Then, if needed, expand the ends of pipe sections to allow the pipe to pass through to the next segment.
WHAT IS A FLARING TOOL?
Flaring tools use very old technology dating back to the beginnings of metalworking. They are essential in professional and amateur applications, enabling pipe fitting. These tools don't necessitate a high level of technical knowledge; almost anyone can use them. Flaring tools are evaluated based on their ability to form tight fits. The capacity to produce tight fittings is crucial.
Flaring and swaging equipment are used to join copper tubing and gas pipes. The end of copper or another thin-walled tubing can be gradually widened with a swaging tool so that one tube can fit inside the other and be connected. For most non-high-pressure applications, single-flare instruments are employed. In high-pressure applications like air conditioning and refrigeration, double-flare tools are used.
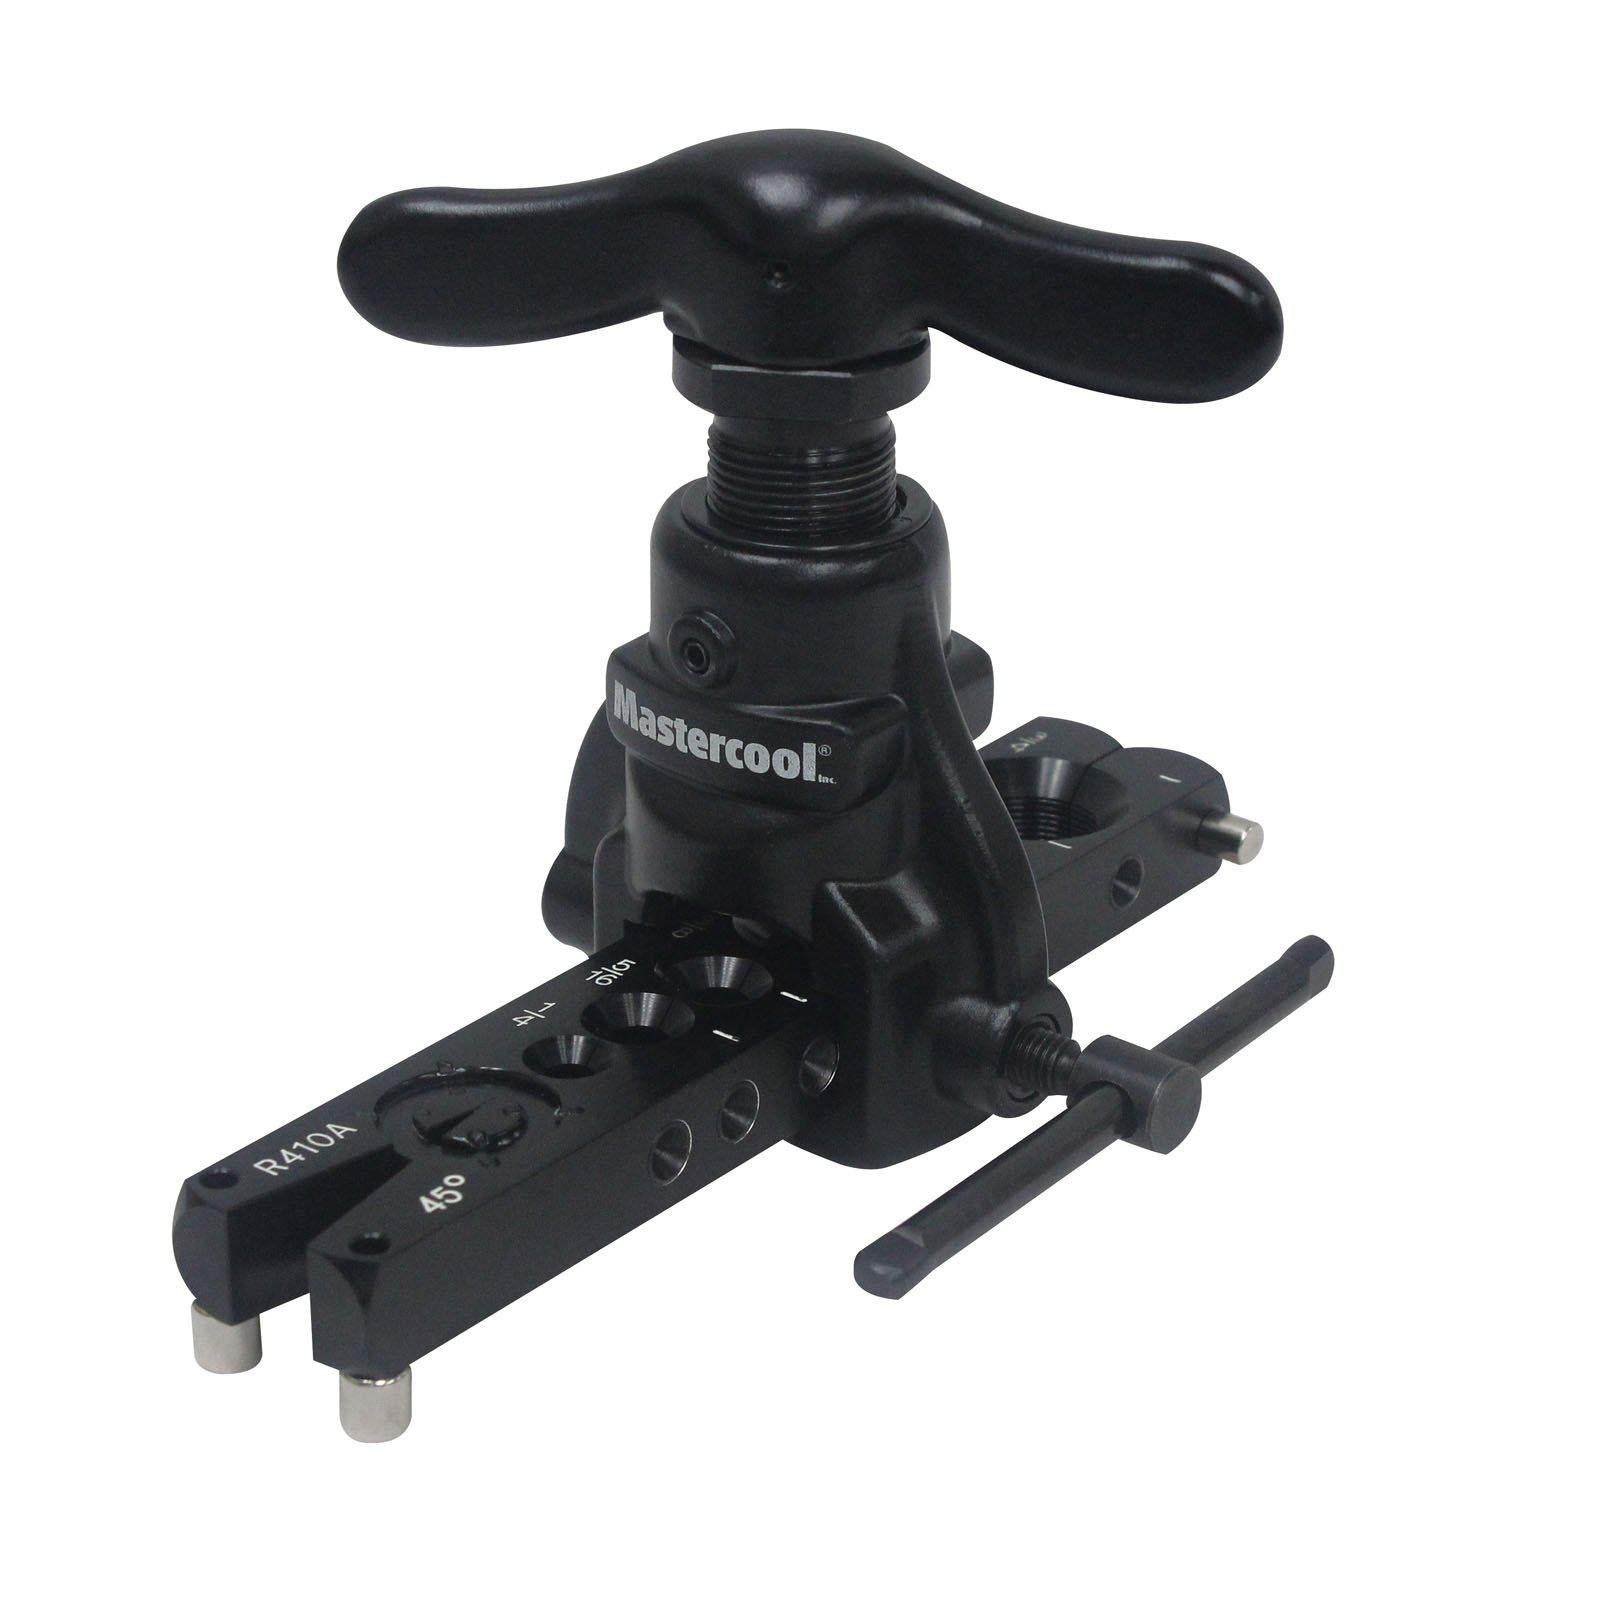
HOW DOES A FLARING TOOL WORK?
The main purpose of a flaring tool is to enlarge the end of a pipeline and create a flare. The primary role of the flare tool, in other words, is to make the finest possible fits of tubing ends to adopt the other point.
The female portion of the pipe is the flared portion, and the male part is the end where the flare connects. It's also known as an adopter. We can call flaring tools adopting tools since they flare at the end of the tubing to accept the adopter or opposite side. It's simple to use; minimal effort is necessary, and the job is completed in a short period.
HOW TO USE A FLARING TOOL
- Use a tube cutter instead of a hacksaw or other cutting instrument to achieve a clean cut. Hacksaws and other cutting tools can result in an uneven cut or burrs, which will impair the flare.
- Eliminate any burrs and dirt all over the pipe end with a deburring tool or abrasive cloth.
- Place the flare nut on the pipe with the tapered end facing away from the flared pipe's end. Before both ends of the tube are flared, you must install the nuts.
- Place the pipe in the die block's matching hole. Your flare should work out nicely with the pipe end flush against the block (others prefer to leave about a 1/8-1/16 inch hanging out).
- Start by tightening the wingnut nearest to the pipe.
- Then tighten the wingnut on the far side.
- Place the yoke on the die block. On the underside of the block, it should hook or clamp into place.
- Place it such that the cone is squarely above the flared pipe. To move the cone closer to the pipe, turn the handle.
- Continue spinning until the cone is entirely placed in the pipe and can no longer be tightened (without great force).
- Remove the yoke and back out the cone.
- Take the pipe out of the dice block and set it aside. The smoothness and evenness of the newly flared pipe end are essential.
- Check it against the fitting's body to ensure the flare is fully and evenly seated on the fitting without touching the threads.
Ensure you don't use joint sealing chemicals or tape on the threads when installing the new flare fitting. To make joining your fitting easier, you can use a drop of threading oil. Always perform a leak test after making any new connection, especially if dealing with a gas or oil line.
If you're learning a new technique, you should probably practice on any spare soft copper tubing you have on hand; purchase an extra foot to play around with if you're buying new tubing. It will pay off when it comes to crunch time!
WHAT ARE THE COMMON TYPES OF FLARING TOOLS?
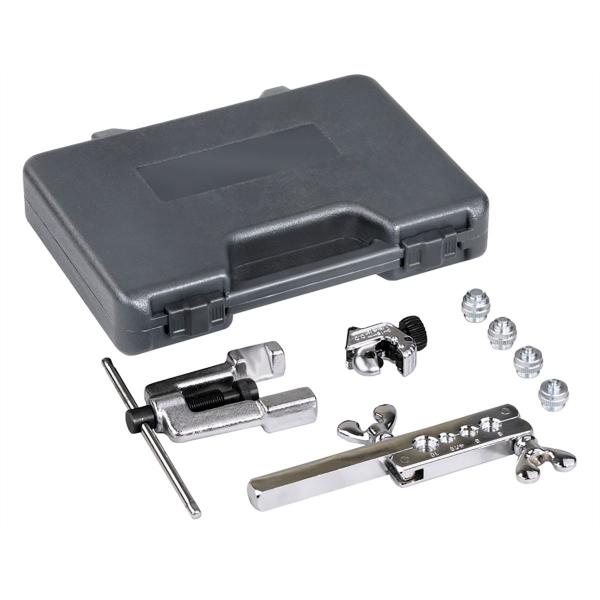
Bar Type Flaring Tool
It's the most widely used flaring device. It's made for flaring tubing in confined spaces. It has a simple design and is straightforward to use. These dies have several holes to fit tubing sizes ranging from 3/16 to 5/8 inches.
This tool is composed of alloy steel that has been hardened. It's made up of two sections and is meant to grab tubing. On each end of the bar, two butterfly nuts are installed. These connect the bar's two halves and provide pressure to the tubing. Place the tube in the hole that corresponds to the tube's size. Extend the tube's end from the hole's surface to the height required for flaring. Alternatively, it's preferable to follow the manufacturer's instructions.
The tightened bar will now hold the tubing. It's critical to tighten the butterfly nut closest to the tubing completely. Manually pull it as much as possible. The other nut tightens until the bar has a good grip on the tubing. Place the handle yoke over the bar and turn to secure it in place. Move the cone into the tube opening by turning the handle clockwise.
Expand the opening of the copper tube until it reaches the flare bar's bevelled mating surface. Return the cone to its original position and repeat the operation twice. As a result, the copper will sit more comfortably on the bevelled edge of the bar and will be burnished for a better seal. Remove the tube by unscrewing the handle and opening both bar parts. Examine the flare's quality. Wipe the tools and oil them lightly for a smooth and continuous operation.
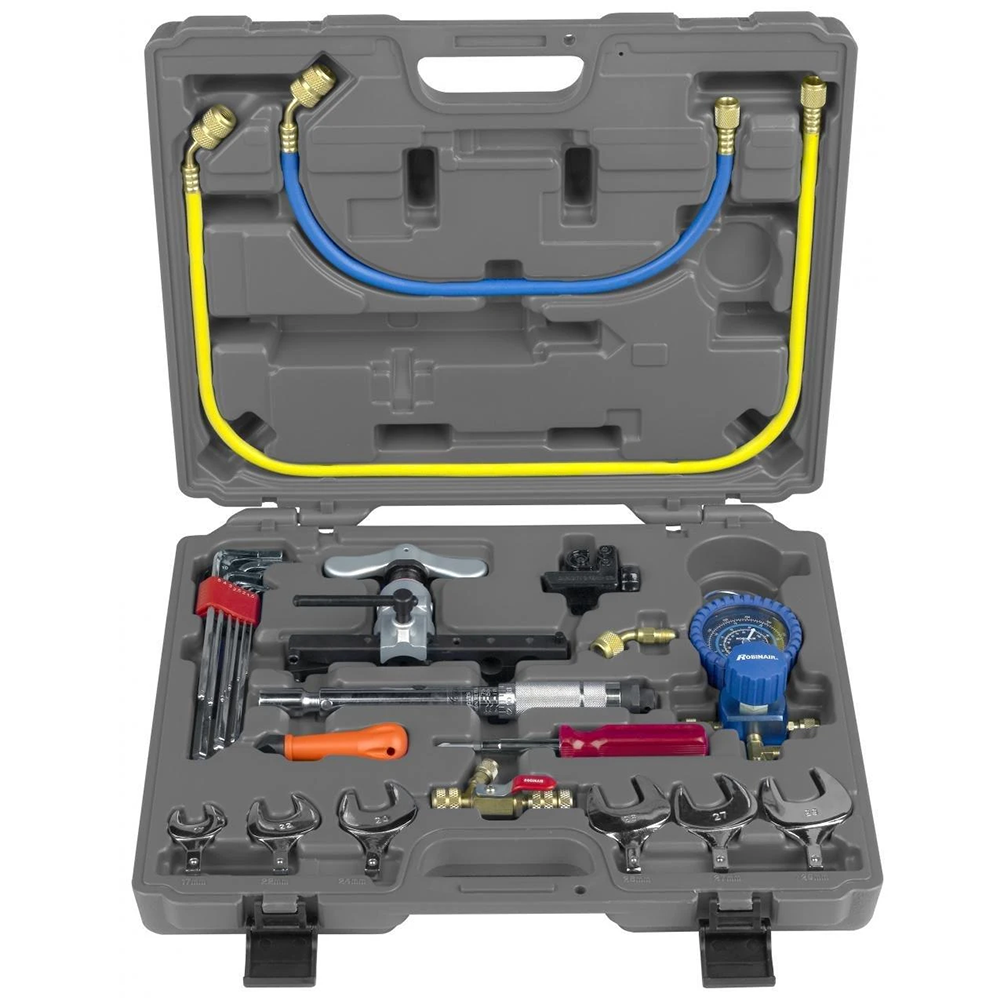
Hydraulic Flaring Tool
A variety of dies, tools, a cone, a deburring tool, a push connector, a tubing cutter, a screw handle, and other items are included in this set. We'll now show you how to create a double flare out of 3/16-inch tubing.
Process
First, we must cut the pipeline's end to make it bright and square. In the tubing cutter, place the pipe. Set the rollers against the pipe. Then, place the cutting wheel in the middle and opposite the roller by turning the thumbscrew up and down. Turn the thumbscrew until the pipe cutter comes into contact with it. Over the pipe, spin the cutting tool. Turn the screw slightly, tighten it a little, rotate the cutting tool over the line and continue.
The cutter will gently chop the pipe. If we apply too much force to the pipe, it may shatter or deform. A nice flare requires a clean end, a smooth cutting edge, and an exactly round pipe. As a result, we must exercise caution when cutting a pipeline. Using the deburring tool, deburr the pipe's end for a few seconds. It's now ready to be turned into a double flare.
This double flare has two steps. Some of the materials needed include 3/16 split dies, pipeline, double dies, and the handle for the first stage. Place the dies in the tool. To properly set the dies against the tool's bottom at the back, push them downward. The splitter will not be centred or square if this is not done.
Place the pipe in the dies and slide it in. It would help to flush the line ends against the dies' edge. Tighten the screw by turning it clockwise. Now unscrew the handle, insert the die parts, and screw the handle back in place. The centre of the die pieces moves within the line. You have now tightened the thumbscrew. Pump the handle until it becomes difficult to turn. Half-turn the thumbscrew to loosen it. Remove the dies by unscrewing the handle.
We've accomplished the first step by placing a bubble at the end of the line. Place the cone in the handle in the second step. Unscrew the grip even more if necessary. Screw the handle in place until the cone reaches the pipeline's terminus. Pump the handle while tightening the thumbscrew. Stop it and loosen the thumbscrew when it becomes difficult. Remove the cone by turning the holdout. Open the pipeline by reducing the other handle screws. At the pipeline's conclusion, an excellent double flare has been discovered.
BUY A FLARING TOOL FROM HVAC SHOP
Buy only quality flaring tool sets in Australia from HVAC Shop. Because many kits include pipe cutting functionality, flare tools are also known as cutting tools. It's vital to keep in mind that all of these instruments function best with soft tubing, largely copper. Harder metals are beyond their ability to adjust.
Warning
Because many kits include pipe cutting functionality, flare tools are also known as cutting tools. It's vital to keep in mind that all of these instruments function best with soft tubing, largely copper. Harder metals are beyond their ability to adjust.